MY FILMING SET-UP: BEHIND THE SCENES OF FILMING ONLINE COURSES
I get a lot of questions about how I film my online courses so in this blog post I'm going to take you behind the scenes to show you what equipment I use.
Please note that some of the links to specific pieces of equipment in this blog post are affiliate links - If you use my link - I get a small commission at no additional cost to you - which will go toward my art supplies and filming equipment! I appreciate your support!
This blog post can also be digested in the form of a YouTube video which you can find here:

The chaos behind the camera!
STARTING OUT
So first I have to say, I know that at first look this looks like a room full of a lot of equipment, but I certainly did not have all of this when I first started out.
For my first online course, all I had was this Lumix compact camera (not mine – this is borrowed from my husband!), and for audio I used a pair of old Apple headphones that had a little microphone in them.

That Lumix camera is still in my setup, and is what I called my camera 2 which usually sits off to the side a little for a slightly close up view of whatever I'm doing on the desk, which is quite important to show some alternative angles of demonstrations.

This is a camera which I would not recommend as a primary filming camera - it’s really best suited to photography, although it does a great job of filming in 4K and I particularly like the manual focus mode, but I had a disastrous time with it filming myself (more on that below), but for camera 2 (to be used for a fixed second angle, or for shooting close-ups of b-roll), it’s great!
UPGRADING MY LIGHTING
The first bit of equipment I purchased was a pair of Neewer LED lights. I had already made 4 courses by the time I got lights, so was relying just on daylight for lighting at that stage, but then I started trying to make a course during the middle of winter, which was really tricky because we don't get that much daylight in the UK in the middle of winter so these lights made a huge difference.

My first 4 courses: All recorded relying only on daylight!
TIP: One thing I learnt through trial (but mostly error!) is that these kind of bright LED lights work much better to improve the overall brightness of a room by pointing them at the walls and ceiling - NOT directly at me, which created all sorts of issues with bright spots, contrast and temperature. It’s all a learning curve! But the key takeaway here: bounce the light off the walls and ceiling to give you a much nicer, even and diffused effect :)
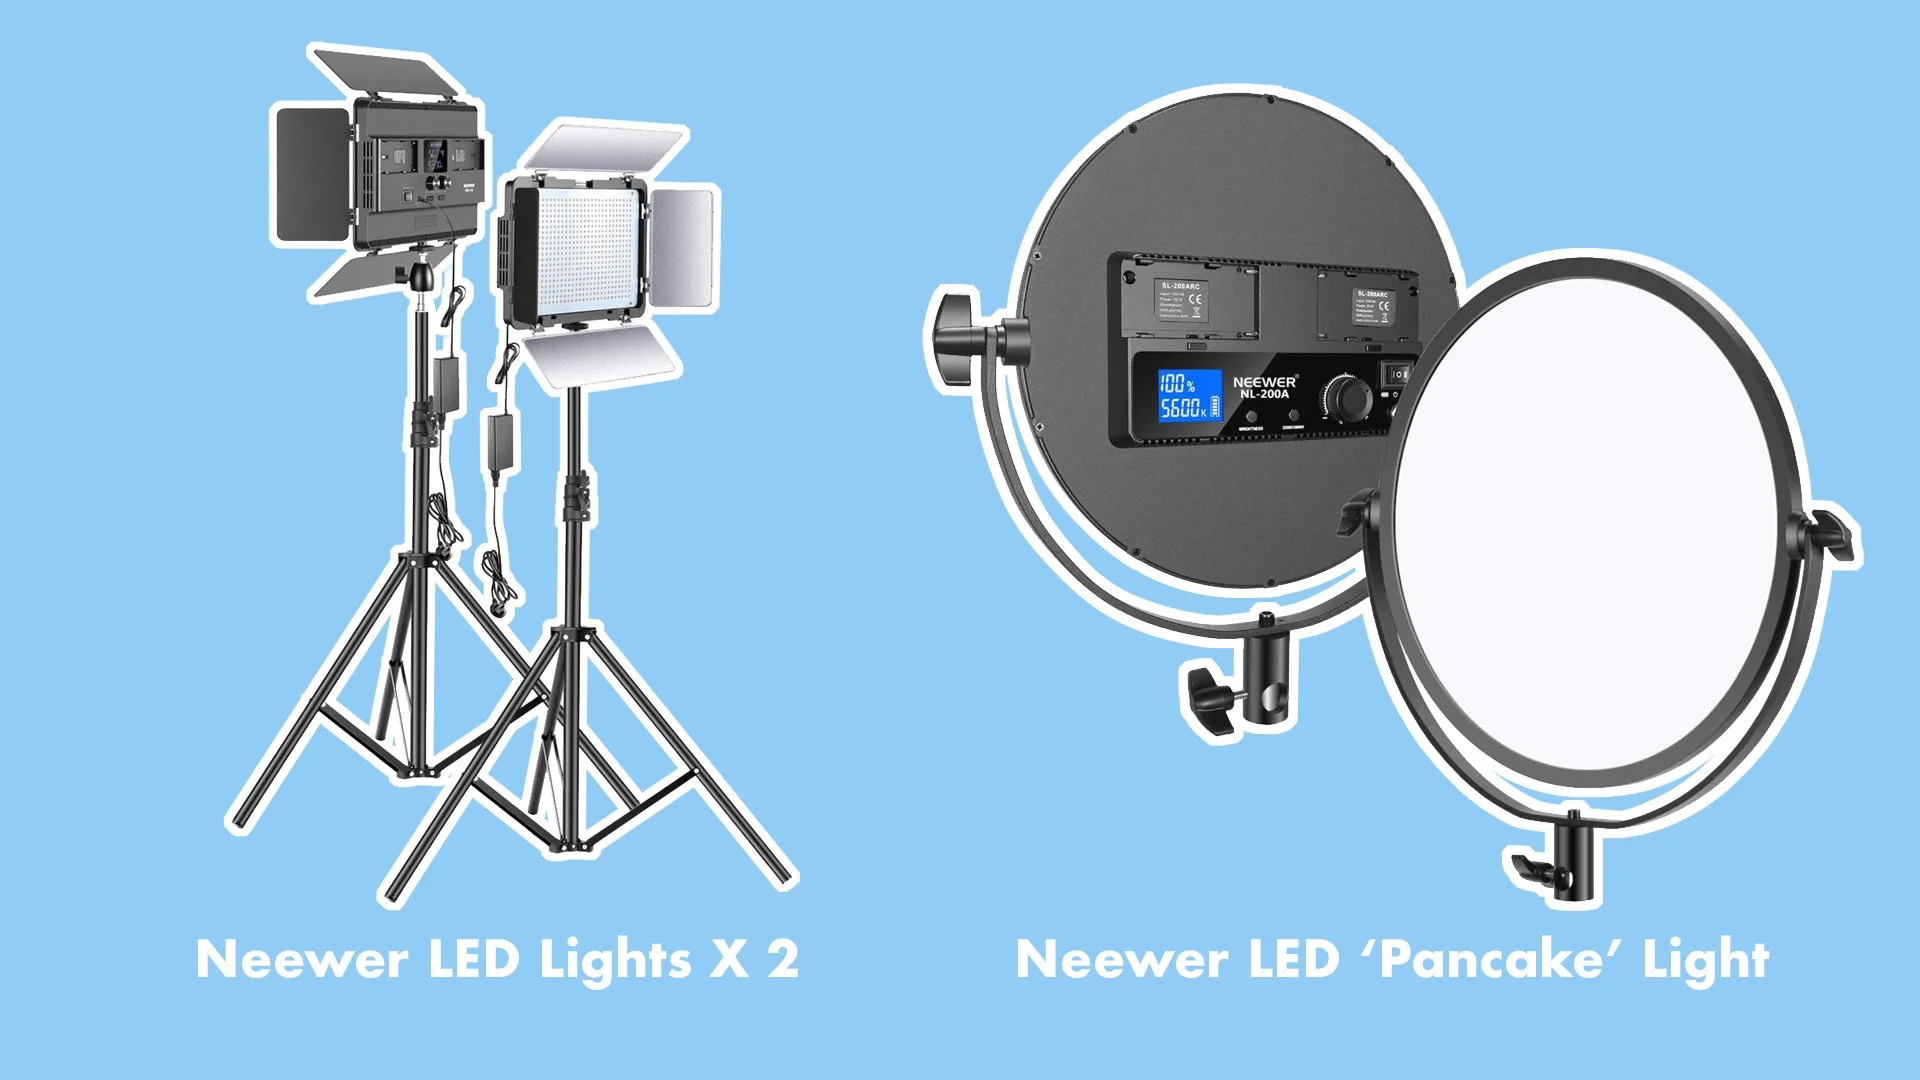
Once I had figured out how to improve the brightness of the room, I realised there was often a bit of a dark shadowy spot, and the centre of the frame was not as brighly illuminated as I would have liked it to be, which led to me purchasing a third light, which I use directed at me but on very low intensity - dialed right down to around 20% to ensure I’m not in a spotlight with harsh shadows, but the centre of the frame where the important things happen is nice and brightly lit.
This type of light is often referred to as a pancake light or flapjack light, and provides a really powerful amount of light in a very slimline package - which is really helpful if you don’t have the space for large soft box style lights.

What a difference one light makes - the transition from a 2 light set-up to a 3 light set-up
UPGRADING MY AUDIO
My first 4 courses were Photoshop courses, so the majority of the content of my filming had been screen recording. My first audio upgrade from the Apple headphones was to a Blue Snowball Microphone. This gave me much better audio quality, and plugged into my computer via a USB cable, so I could record the higher quality audio directly onto my computer.
Once I decided to create more drawing based courses, this audio set-up became quite problematic because it meant I had to be within a few feet of my computer (which is not a laptop!) and I also wanted to be able to move around more, and so I upgraded my audio by purchasing a Rode Lavalier Microphone together with a Zoom H1n Audio Recorder. This means the microphone is pinned to my clothing, which is connected to the audio recorder, and I can move anywhere I want and the audio will stay consistent - this has been a real game changer!

As well as giving me freedom to move wherever I want, the combination of the lavalier microphone with audio recorder has given me really fantastic audio quality. I don’t tend to do any audio processing other than adjusting the volume levels - I know a lot of folks have a really hard time removing things like echo, reverb, or other pesky unwanted audio effects - filming in a small carpeted room definitely helps with this, but I also believe that these 2 bits of equipment have a lot to do with that too!
MY 2 BIGGEST TIME SAVERS
Filming can be a lengthy, stressful process which is a lot of hard work! There are 2 bits of equipment which I would say have made the biggest impact on making the whole process MUCH faster and less stressful - it’s hard to pick between the two of these, but if I could only keep 2 bits of filming equipment, these would be the ones:
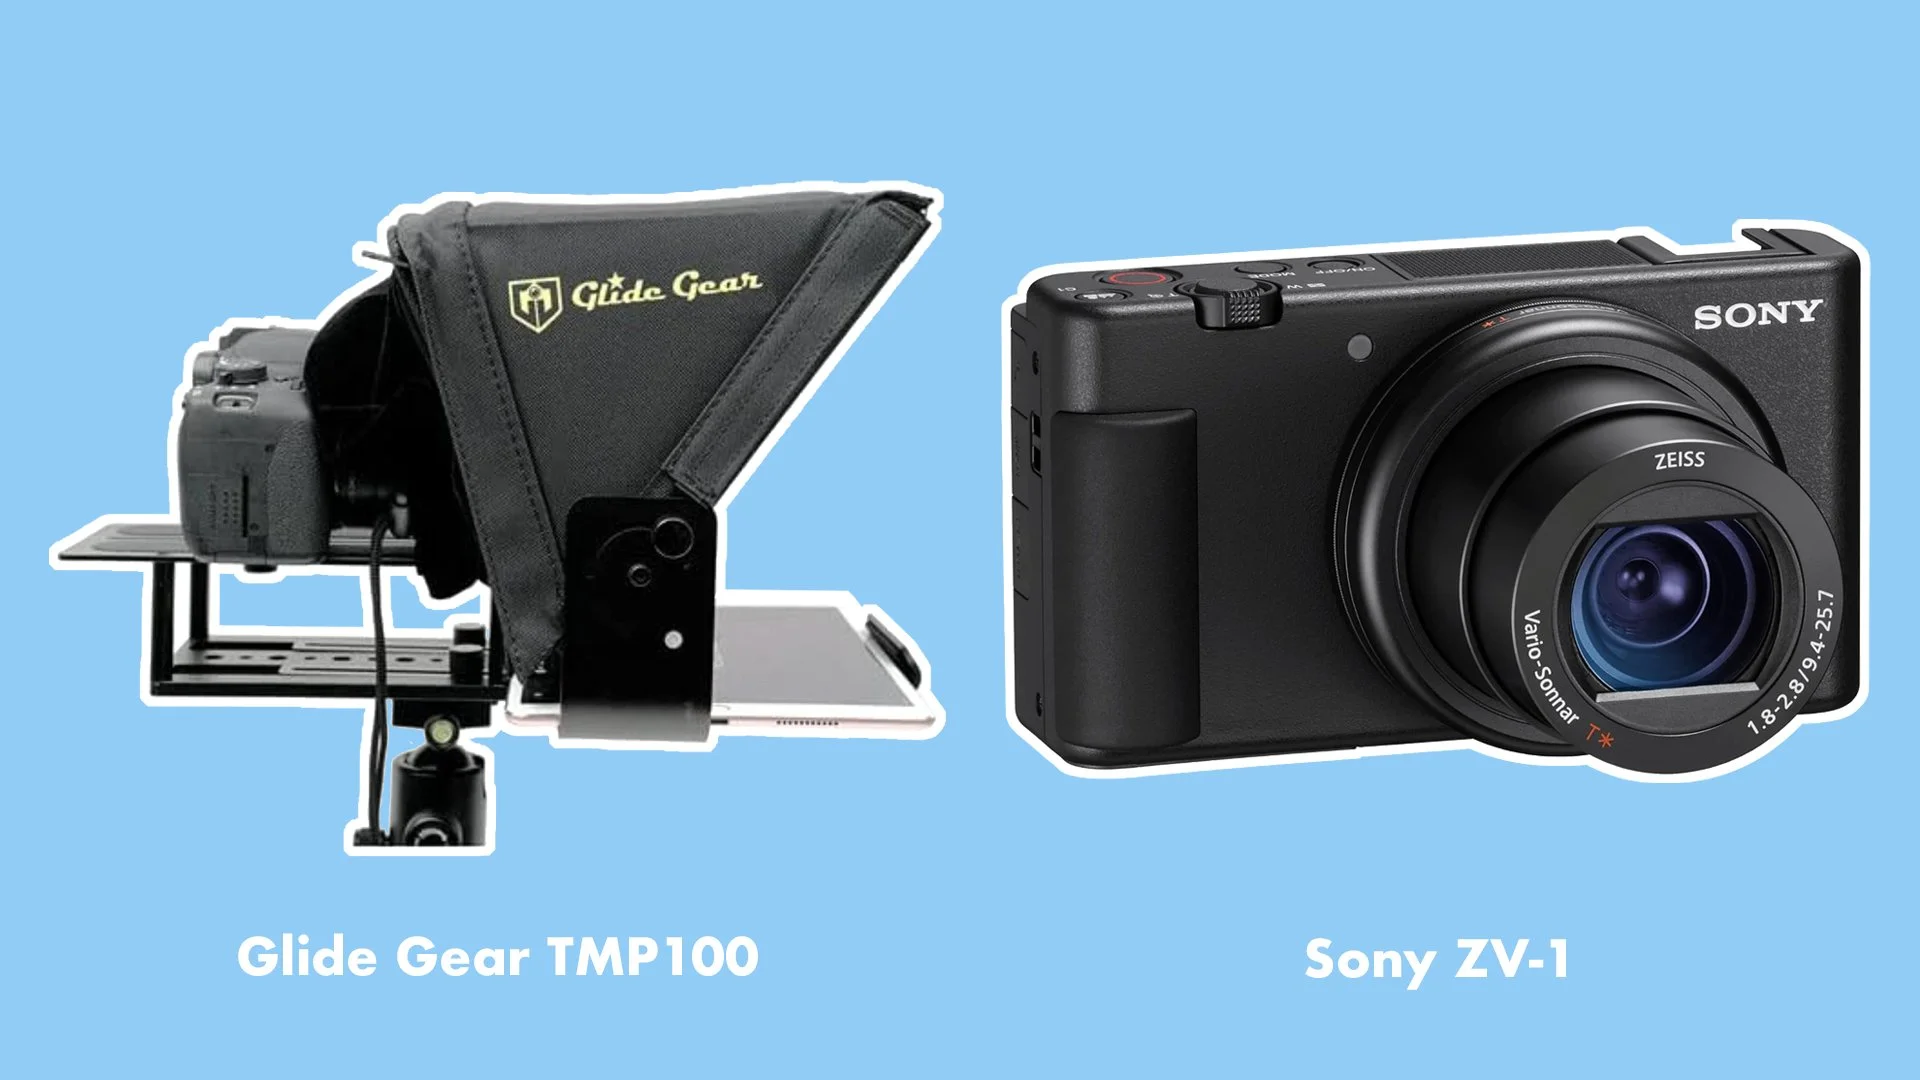
1) Glidegear TMP100 Teleprompter
I am pretty terrible in front of a camera - as soon as a camera points in my direction, I tend to loose the power of coherent speech(!) I am incredibly camera shy, which is difficult when you have to film yourself.
In my early courses, which were mostly Photoshop based, I was not on camera that much as they were predominantly screencast filmed (filming the computer screen), so for the short sections where I needed to be on camera, I would memorise a line then say it to camera, memorise another line, say it to camera - rinse and repeat. This would end up taking me SO LONG - and not only that, but the knock on effect is that editing would take even longer as I needed to piece together the ‘ok’ takes like a jigsaw puzzle. This was bearable whilst there wasn’t much talking head in my courses, but as soon as I started teaching drawing and needing to be in the shot more, I knew it could get really challenging.
For one class, I tried using a teleprompter app on my iPad, which I mounted next to my camera, but you could see that I was not looking directly at the camera a lot of the time to check what I should be saying next, so it wasn’t the right solution.
Eventually, I decided to try a teleprompter, and it changed EVERYTHING! I am not exaggerating when I say that it reduced the filming time of talking head sections by at least half, possibly more. Not only that, but there are many occasions where I have managed to get through a whole section in one take, which hugely reduces the editing time and makes the overall production feel much more polished to not need so many cuts.
If you’re not familiar with a teleprompter (I wasn’t until I got one), essentially it consists of a sheet of reflective glass at a 45 degree angle, which reflects your script (which is displayed on a tablet or smart phone), and there is a camera mount behind the glass - this means that you can be looking directly at your camera as you read your script. I use an app called Prompt Smart Pro which has voice recognition, so the text will scroll with my voice (providing it can hear you and you don’t deviate from the script!). It takes some time and practice to be able to use a teleprompter without looking and sounding like you are reading, but the amount of time and stress that it has saved from filming days has been absolutely worth the investment.
My 2 biggest time-savers - I ❤ them!
2) Sony ZV-1
Purchasing a Sony ZV-1 to use as my main camera (Camera 1 - the one which sits behind the teleprompter glass and films me straight on) has been one of the best equipment upgrade decisions ever.
When I film, I am completely by myself (there is no one else to check the focus for me or hit record!) so the logistics of that mean that I have to hit record, then run behind my desk and begin… When I was using only the Lumix LX10 to film my classes, this would often result in me being slightly out of focus if I set it manually, or if I used the automatic focus, would often result in the camera seeking (and sometimes locking focus on part of the background instead!). There was one class which I had to re-shoot 3 times - I can’t tell you how frustrating and time consuming this was - to the point I almost gave up!
The Sony ZV-1 is designed as a vlogging camera, so it’s intended to be used by people filming themselves, and it has an awesome automatic focus that has never let me down yet - it films beautifully in 4K, and it’s also really easy to use. I have used it for photographing my work too, and it works great as a still image camera too.

The dream team! Teleprompter + Sony ZV-1
FILMING FROM ABOVE
For demonstrations, a top-down or bird’s eye view of what you are doing is so important, but it can also be quite challenging to capture this angle effectively. There are lots of budget friendly wiry arms and stands you can purchase, but the difficulty if you use something which sits on your desk is that you can get a really problematic case of camera shake from your movements on the desk (imagine what a bit of vigorous erasing of a pencil drawing might do to your footage!) so I really wanted a solution to film from above which would limit any camera wobble.
On a recommendation, I purchased the GlideGear OH50 Overhead Arm which attaches to a regular tripod or light stand, together with my iPhone 13 Pro. The Tripod the arm is attached to is on the floor (rather than on the desk) which means jogging the desk as I work will not affect my footage.

TIP: One thing I learnt fairly quickly about the iPhone’s native camera app, is that you cannot set the focus and white balance manually (I believe some later versions of the iPhone now do, but do check!). This became quite an issue when reviewing the top-down footage, particularly when needing to speed up footage for timelapse’s - I purchased a third party app called Beast Cam for less than $5 - many other similar apps will do the same thing - which allowed me to manually control these settings using my iPhone to film - giving me a much better result!

WHY I USE A MULTI CAMERA SET-UP
When filming demonstrations, I have gradually switched to using a 3 camera set-up, using the equipment outlined above - this may sound like overkill, but I have found it actually makes the editing much easier when it comes to post-production for a few reasons:
Having 3 camera angles to pick from allows me to vary my visuals regularly, keeping the video more engaging for the viewer.
Often when drawing, your hand can obscure what you’re doing, so having multiple angles to pick from means I can switch to the one which gives the clearest picture of the action.
If I make a mistake or have to pause filming to switch a battery or change a memory card in one of the cameras, having multiple angles means that I can cut the footage from one angle to another, which is much less jarring than using a ‘jump cut’ (cutting out a section of footage from the same angle) which helps to keep the production looking overall more polished, and easy to follow for the viewer.

IN CONCLUSION
I hope this peek behind the scenes has been helpful - I want to finish on a really important point though, and I cannot stress this enough:
You do not need all this equipment to start making online courses! If you have a smart phone, that pretty much has everything you need to get started!
I have gradually accumulated all this equipment over the past 5 years or so, and it is always evolving as my set-up and what I want to film changes, and as new, more effective equipment comes out, or current kit becomes obsolete, and my own knowledge and skills are gradually improving all the time too - I really knew absolutely nothing about making videos when I first started! I hope this blog post shows you what is possible on a very limited amount of equipment - remember I had already made 4 courses before I bought my first piece of equipment!
If you have any questions, please do drop them below and I’ll be happy to answer!