
MINDFUL DRAWING TUTORIAL:INTERTWINE
As part of #mindfultober2023 I am creating a series of free Mindful Drawing Tutorials, so that if you like the idea of joining in with Mindfultober but don’t know where to start, or perhaps you just like to have a little bit of guidance and support as you draw, so you can just relax and enjoy the process, these are for you!
For the second prompt of Mindfultober: Intertwine, I wanted to create something wreath like, although a little bit abstracted.
This tutorial can also be found as a real-time draw with me style tutorial on YouTube, so if you prefer to digest this in video format, be sure to hop on over there!
SUPPLIES
To follow along, you will need:
paper
a pencil
an eraser
a pen
something circular to draw around or a compass
STEP 1: DRAW A CIRCLE IN PENCIL
To get the main circular structure of our wreath, you will first need to draw out a circle on your paper. It doesn’t matter what size your paper is, or the circle - this can work at any size, but you need your circle to fit comfortably on your paper with a little space around the edge. Use your circular object or compass to draw a nice even looking circle on your paper in pencil.
TIP: Don’t press too hard with your pencil, as we will be erasing the pencil lines later!

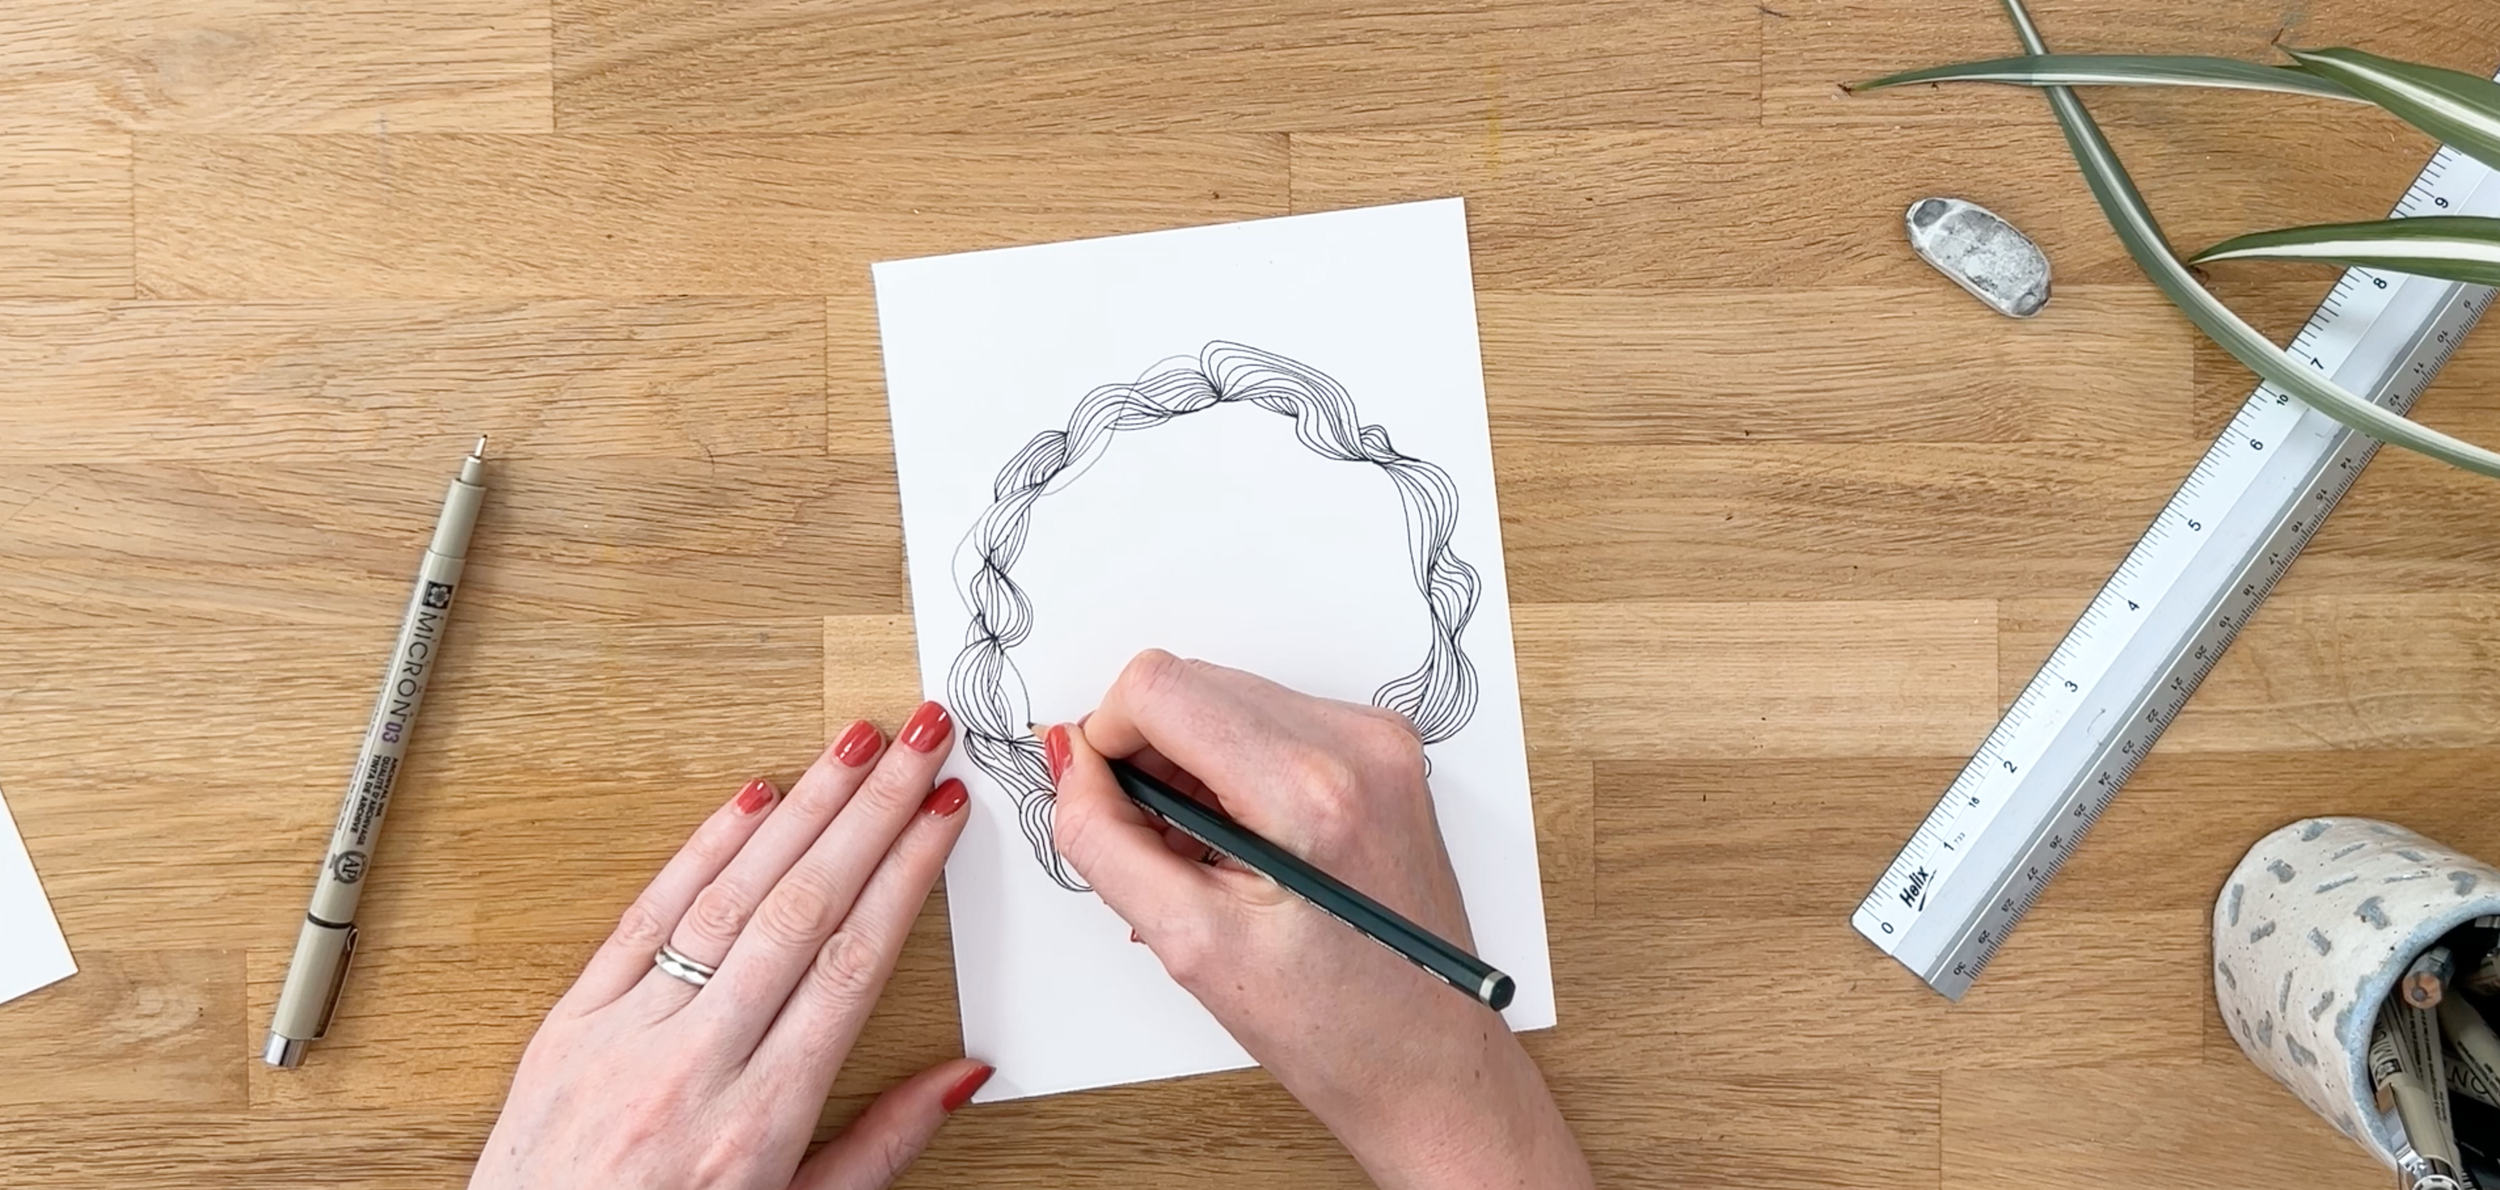
STEP 2: DRAW A WIGGLY PENCIL LINE AROUND YOUR CIRCLE
We are going to begin our wreath by creating a wiggly, organic looking line, so take your pencil and following the circle shape, draw a gently wavy, wiggly line.

STEP 3: DRAW PEN LINES EXPANDING OUT FROM YOUR WIGGLY LINE
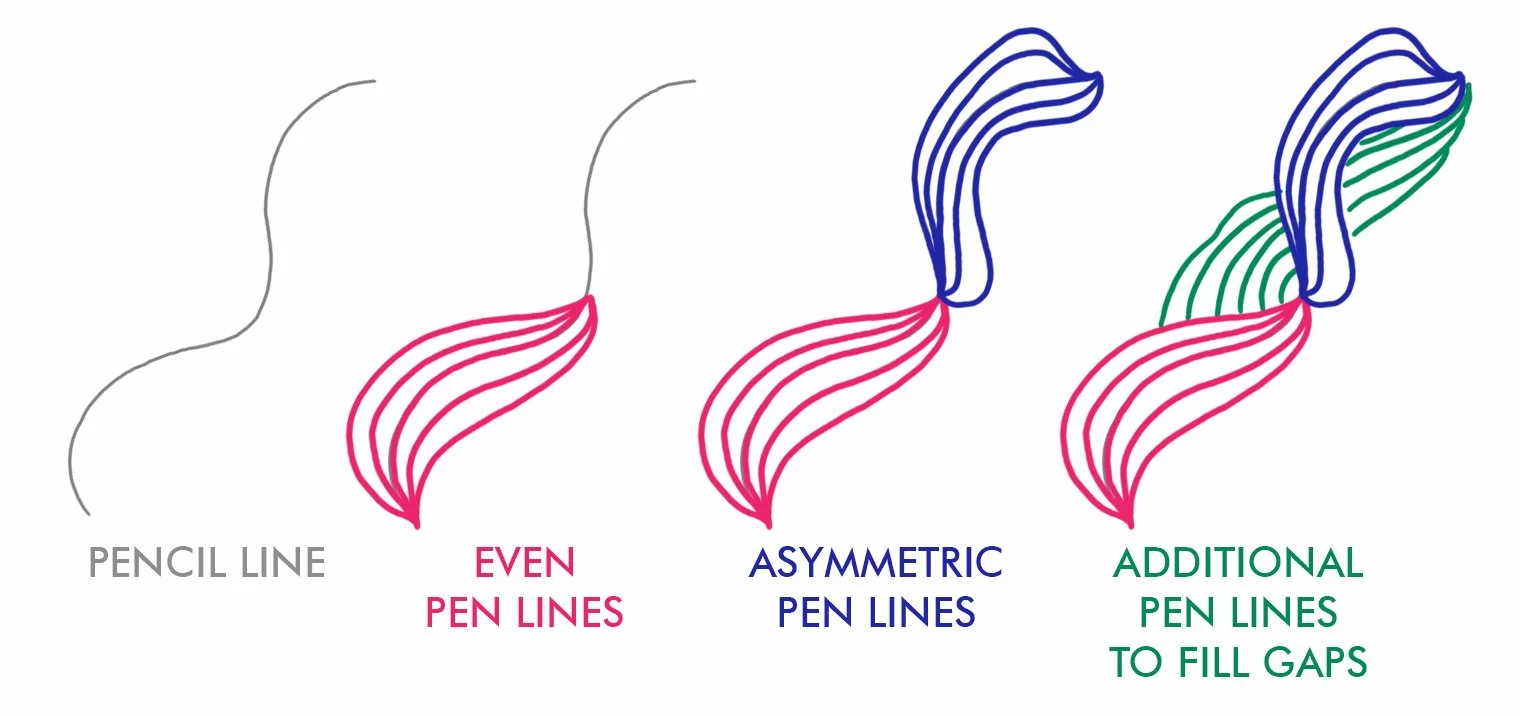
Now take your pen, and going from one ‘dip’ in your wiggly line to the next ‘dip’, first trace your pencil line. Then starting and ending at the same points, draw a few lines above that line, and a few lines below it, so the pen lines appear to fan out from your wiggly pencil line.
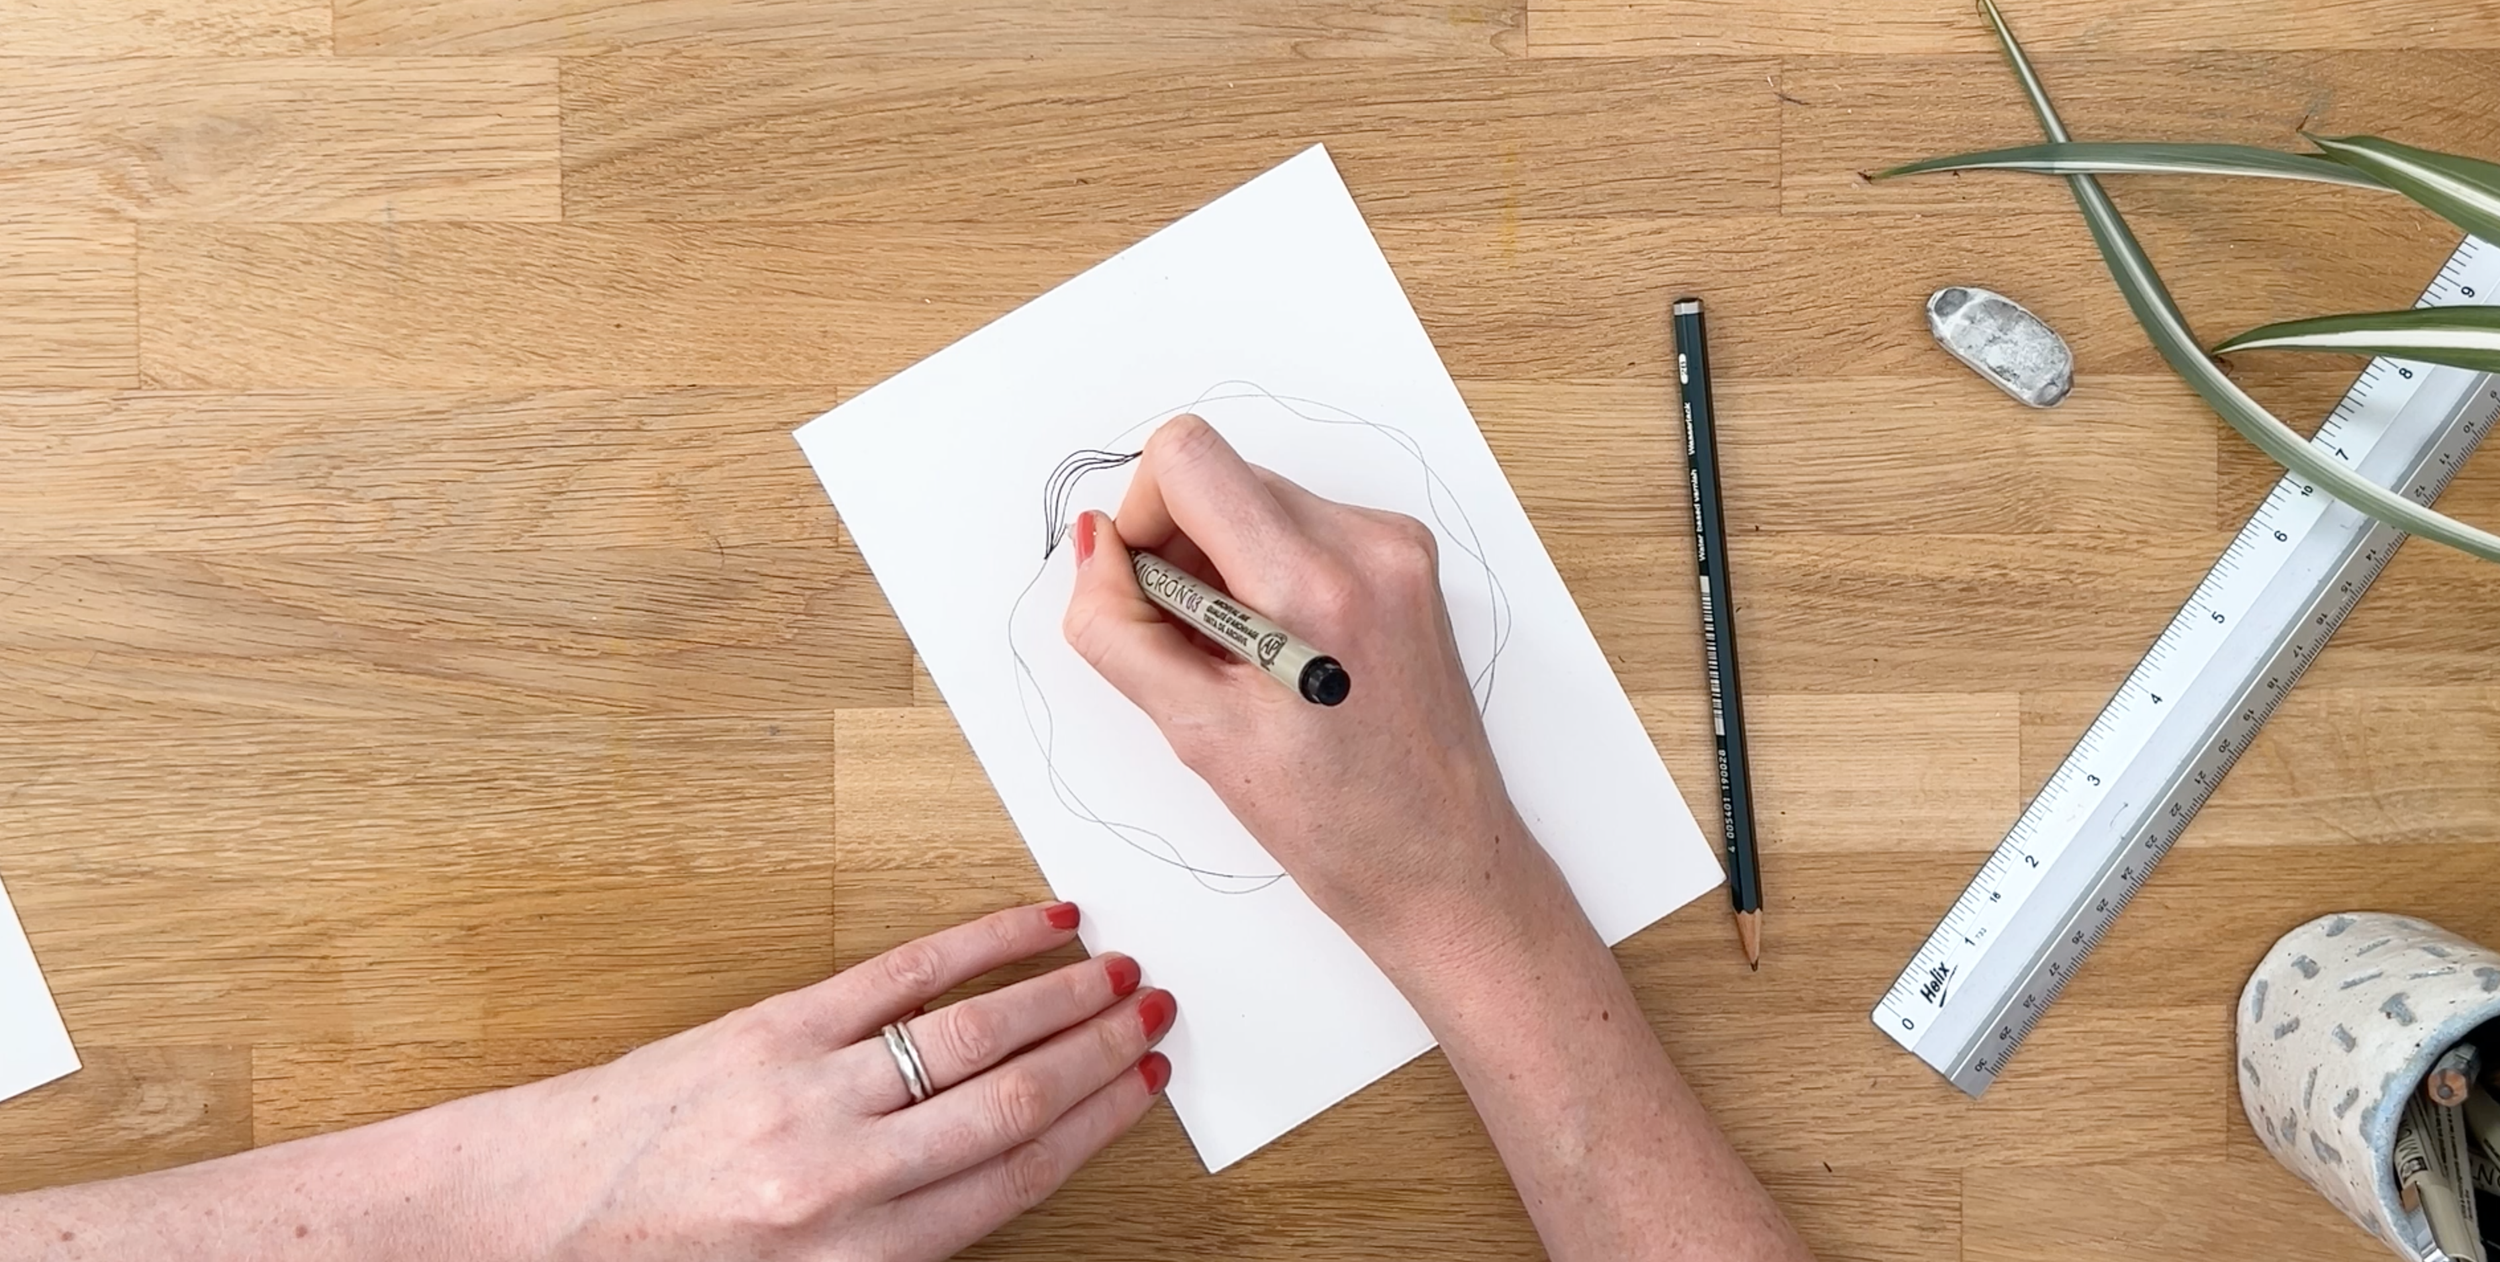
Repeat this process going all the way around your circular wiggly line.
TIP: It can look really effective to make some of your pen lines slightly asymmetric in how they fan out from the pencil line, so that they are not all even - for example, you could introduce a little additional curve to the lines in order to create a more natural and organic effect like this:

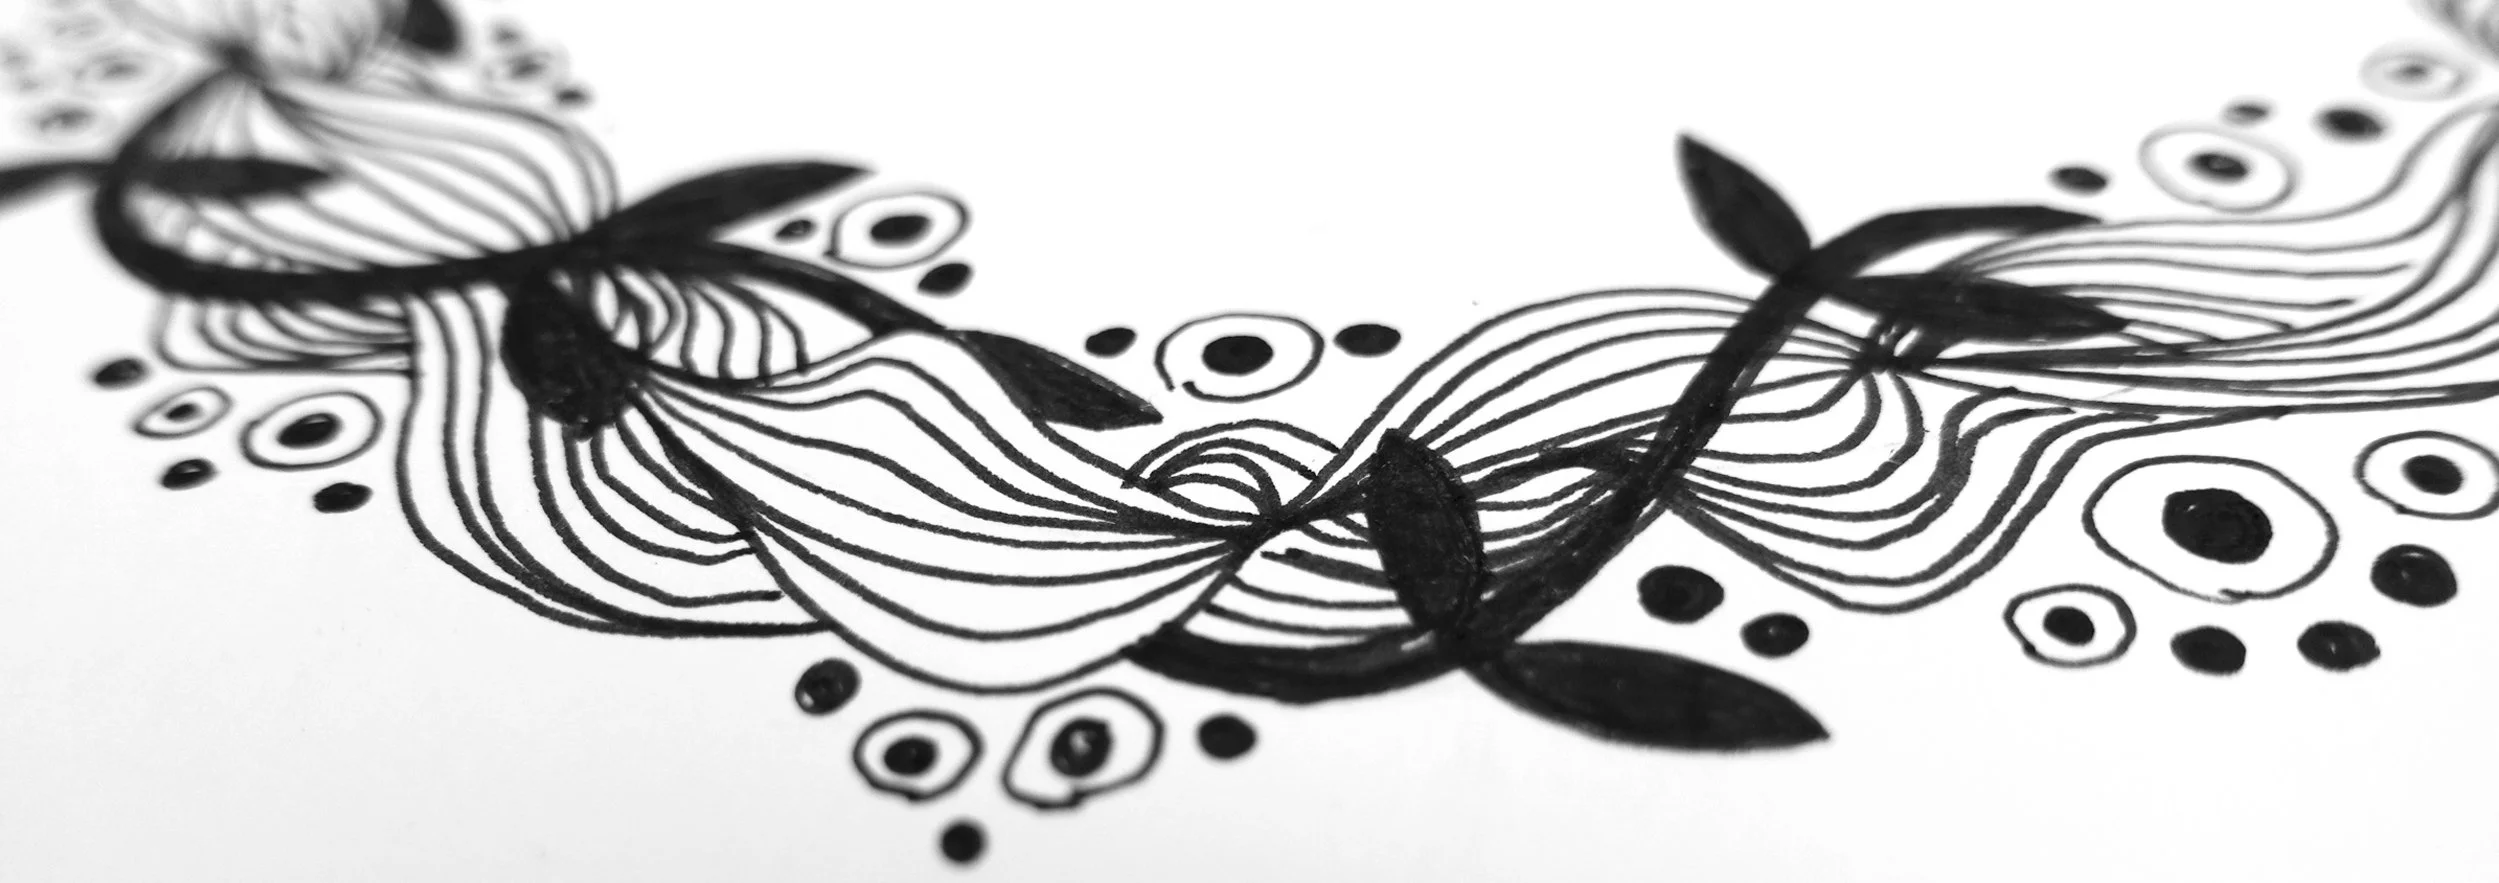
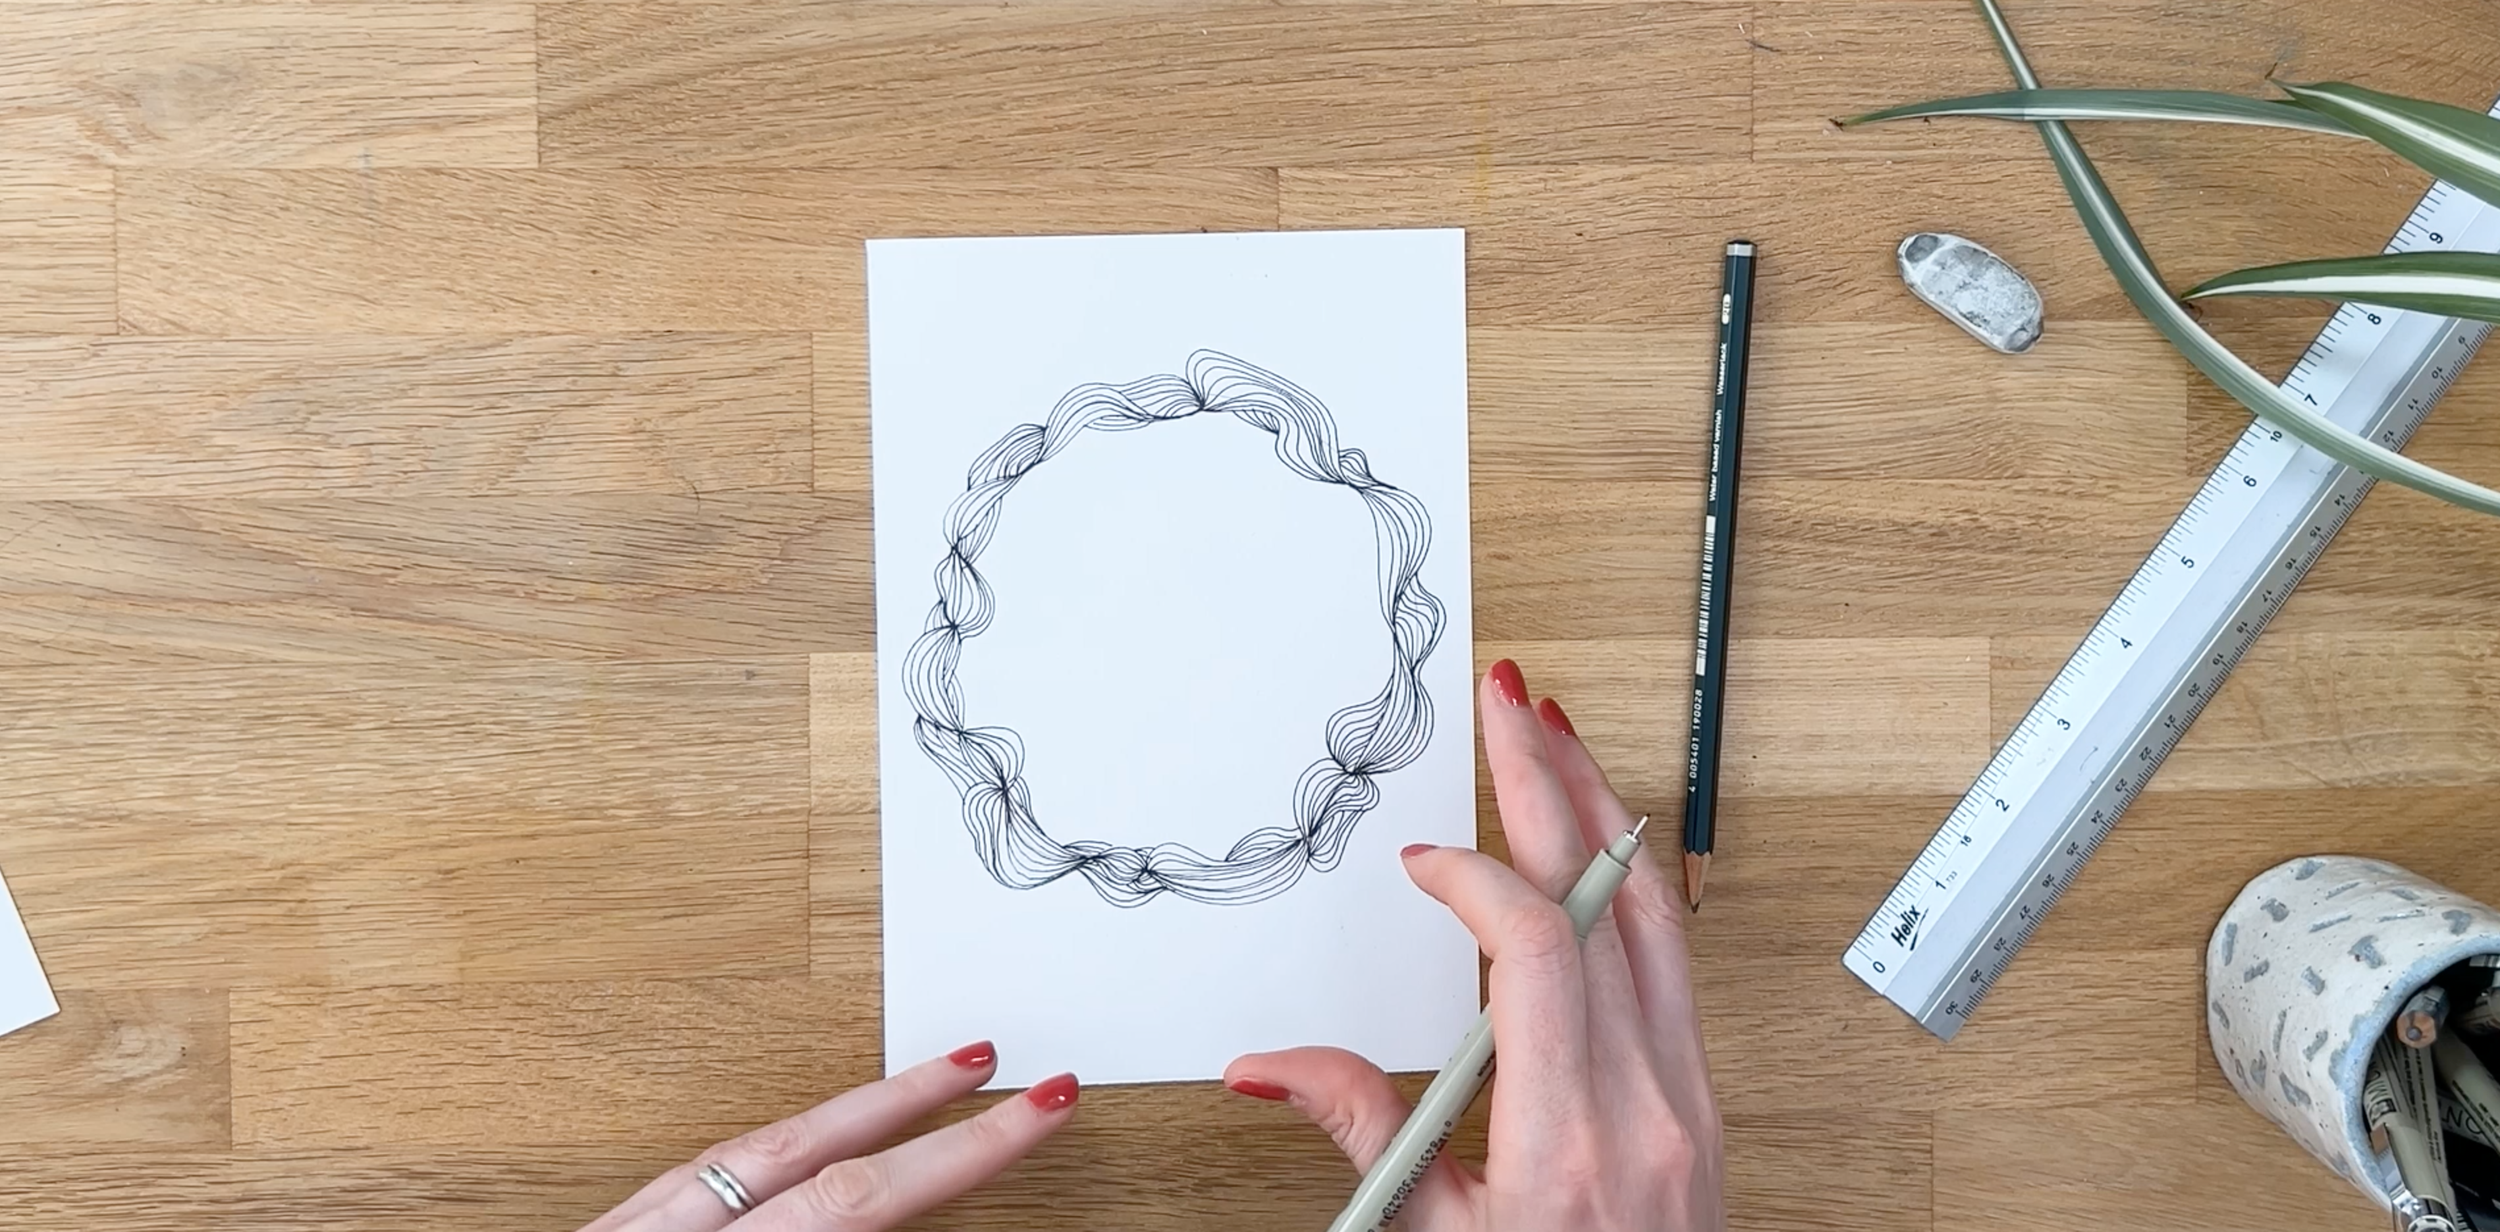
In areas where the lines join together, so the wiggly line becomes a single line, add another section of fanning out, curved lines to help fill the gaps. This will give this layer of the drawing a really beautiful, organic looking intertwining pattern.
Continue adding lines to your wiggly pencil line, and filling in any gaps, until you have created a full circle of intertwining lines like this:
MINDFUL APPROACH
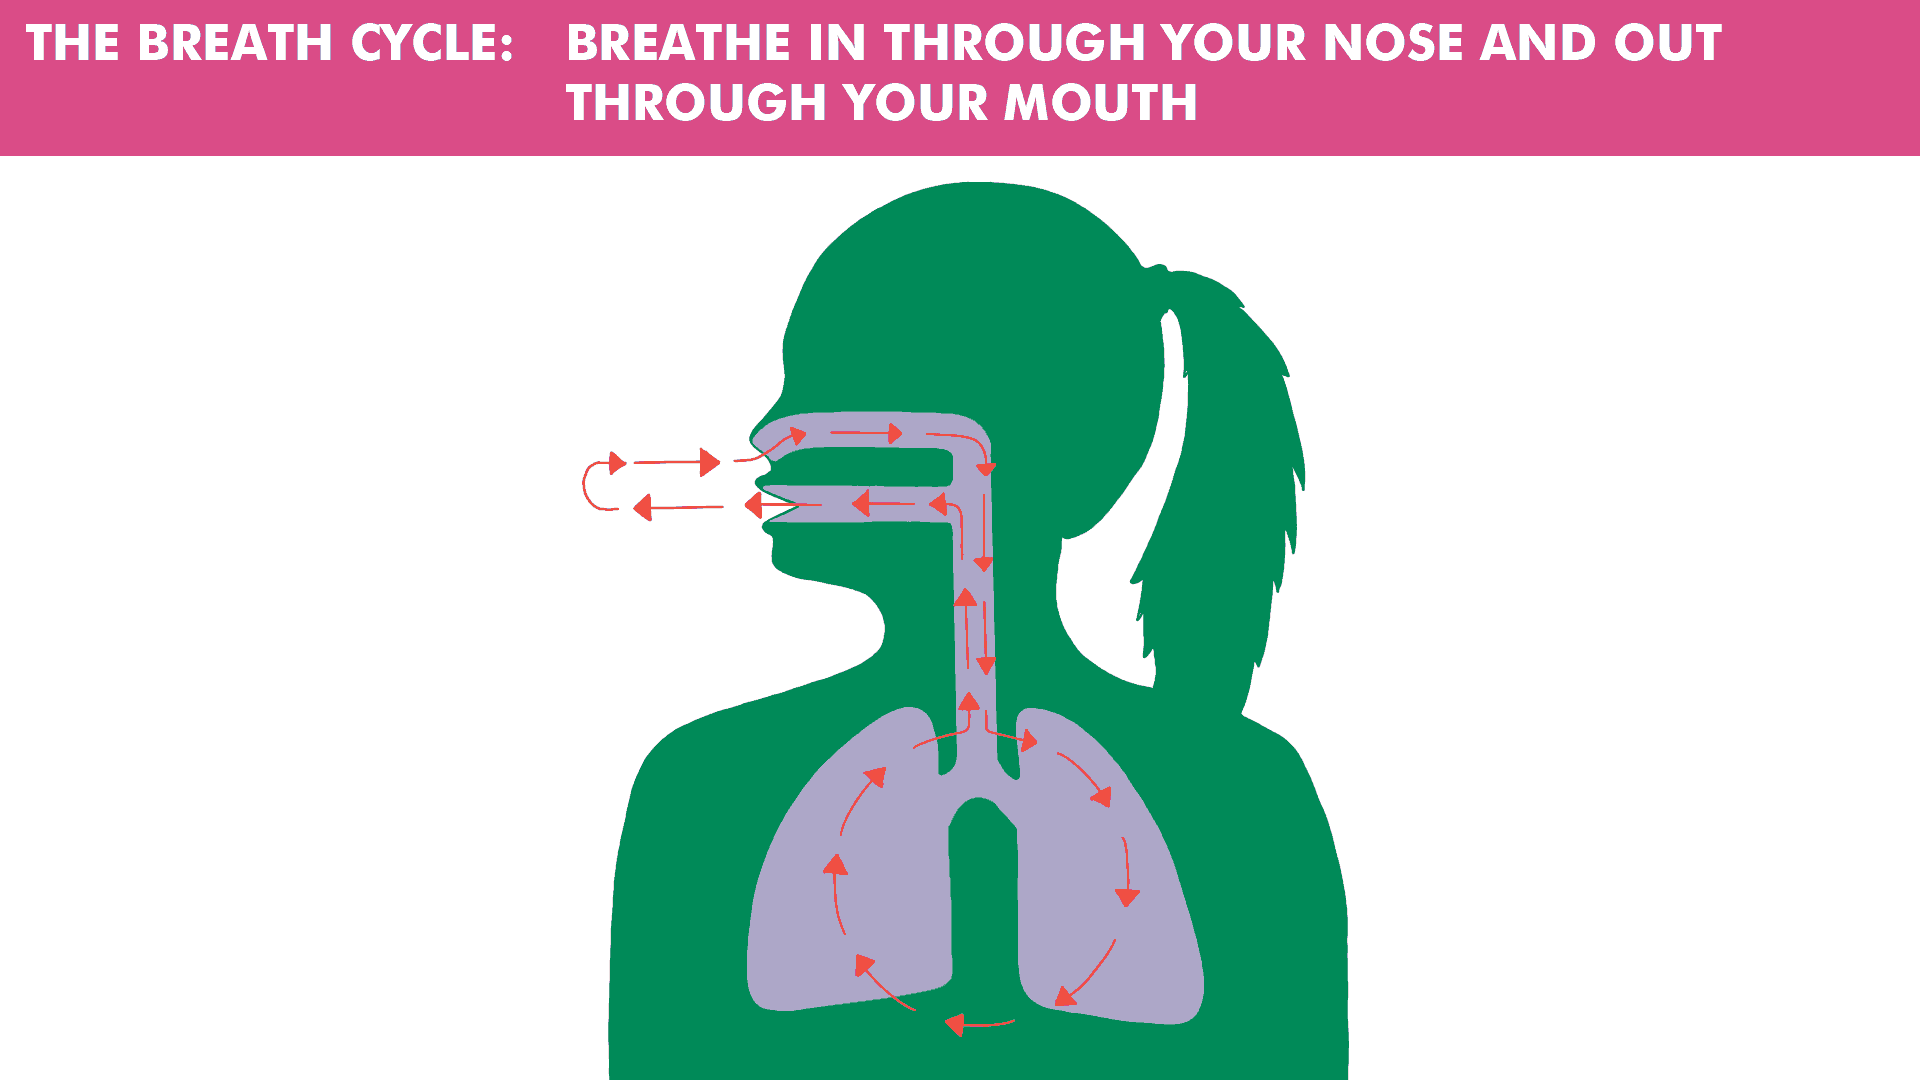
A great mindful approach to try out with this drawing is to connect with your breath. There are a couple of different ways you can do this:
Take a couple of deep breaths, and try breathing in through your nose, and out through your mouth, and as you do this, visualize your breath making a continuous cycle through your body and notice where the breath is in your body as it makes it’s journey through – maybe you can feel it in your nostrils, or maybe you can feel it filling your chest. Just doing this – and it’s literally just a few seconds it takes to do it – can help us to connect with our breath, and notice it. Sometimes we can breathe in quite a shallow way when we’re stressed or even hold our breath (a lot of us do this when drawing too, me included!), so just connecting with it in this way can release that tension.
Once you’re into a drawing rhythm where you are repeating a shape or a mark, there is another way you may like to connect with your breath, and this is by syncing your drawing with your breath cycle. It’s important not to change how you’re breathing, because that can make you feel a bit out of breath or tense, so just breathe normally, but see if you can draw in rhythm with your breathing. For example, I can draw a line with an inhale, and draw another with an exhale. You can change the speed of your drawing to make this work, but don’t change the speed of your breathing.
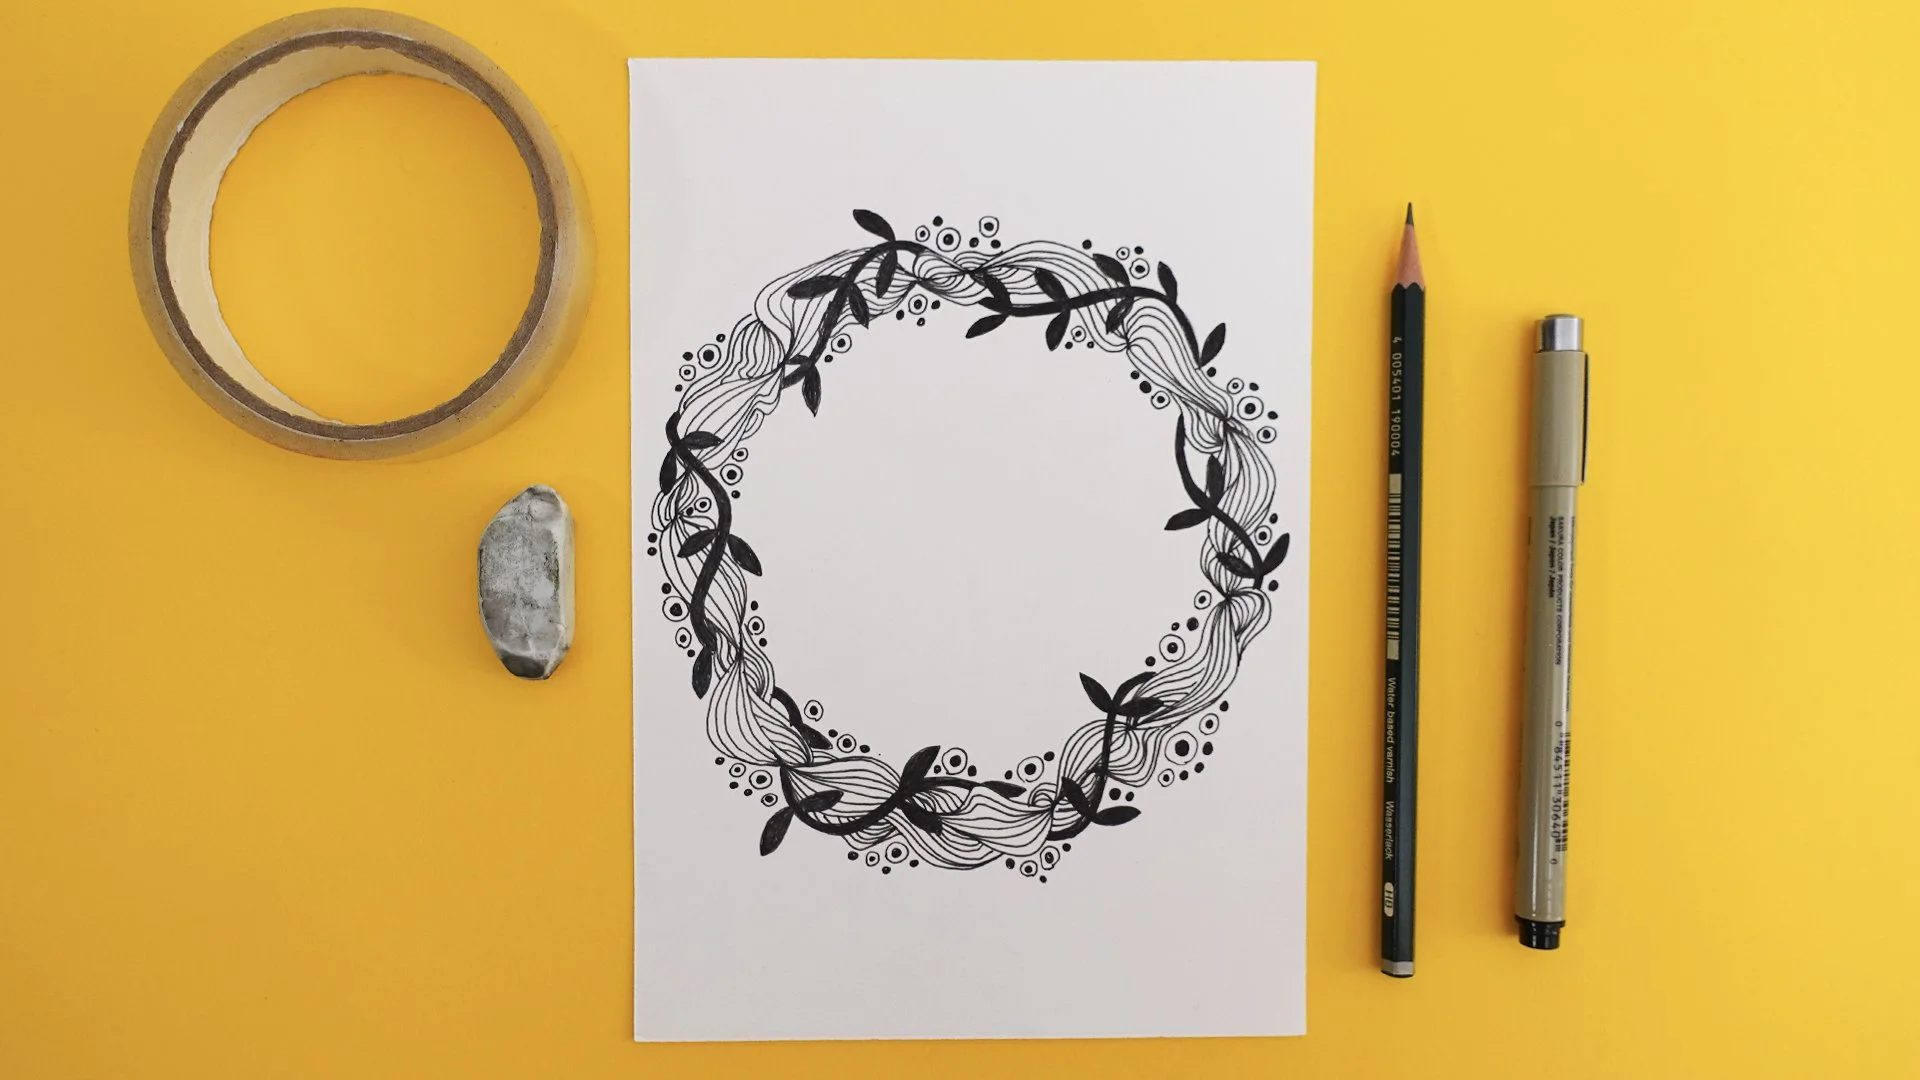
STEP 4: Create a second Layer: intertwining branch with leaves
Go back to using your pencil, and draw another wavy, wiggly line which intertwines in front of, then behind, then in front of etc - your first layer of pattern. This is going to form the structure of the next layer of our wreath drawing.
Make this line a nice thick line by colouring with your pen so that it contrasts nicely against the layer behind it, and add some simple leaf shapes, also coloured in, to create a lovely intertwining branch with leaves on it.
TIP: If you have any parts from your first layer of the wreath which you don’t like, you can cover them with a leaf!

STEP 5: ADD SIMPLIFIED FLORAL ELEMENTS
To finish off our abstracted wreath drawing, add a few simplified floral doodles in the form of circles. You will want to add a few different sizes of circles (I would recommend roughly one large, one medium and one small size) to create a more organic effect, and I would also recommend the large and medium sized circles have a filled-in circle in the centre to represent the middle of a flower - this will also help them to stand out on your wreath drawing. The smaller sized circle could be completely filled in.
Add these circles to your wreath both on the inside and outside of the wreath. Aim to put these circles in areas to help fill the shape back out to a more rounded, circular shape - for example, if there is a section where the circle seems a little flat, or it has a bit of an indentation to it, use these circle shapes to re-create a more circular form.
Keep adding circular floral doodles until you are happy with how it’s looking.
TIP: Usually, adding your circles in little clusters will look much better than adding them randomly - I usually try to add them in clusters of odd numbers - 3 or 5 - which look more natural and balanced.
FINISHING
Once you are happy with your drawing, erase the pencil lines underneath and voila! I hope you enjoyed this drawing!
If you are taking part in Mindfultober and be in with a chance of winning a free year of Skillshare Premium membership, don’t forget to share your drawing on Instagram and tag both Shelley @shelleyskail and I @melrye on Instagram so that we can see your gorgeous art! You’ll also need to save the image below and re-post it when you share your art (it can be the second image!) and let us know in your image caption how you found the process - all the details can be found in this blog post.
